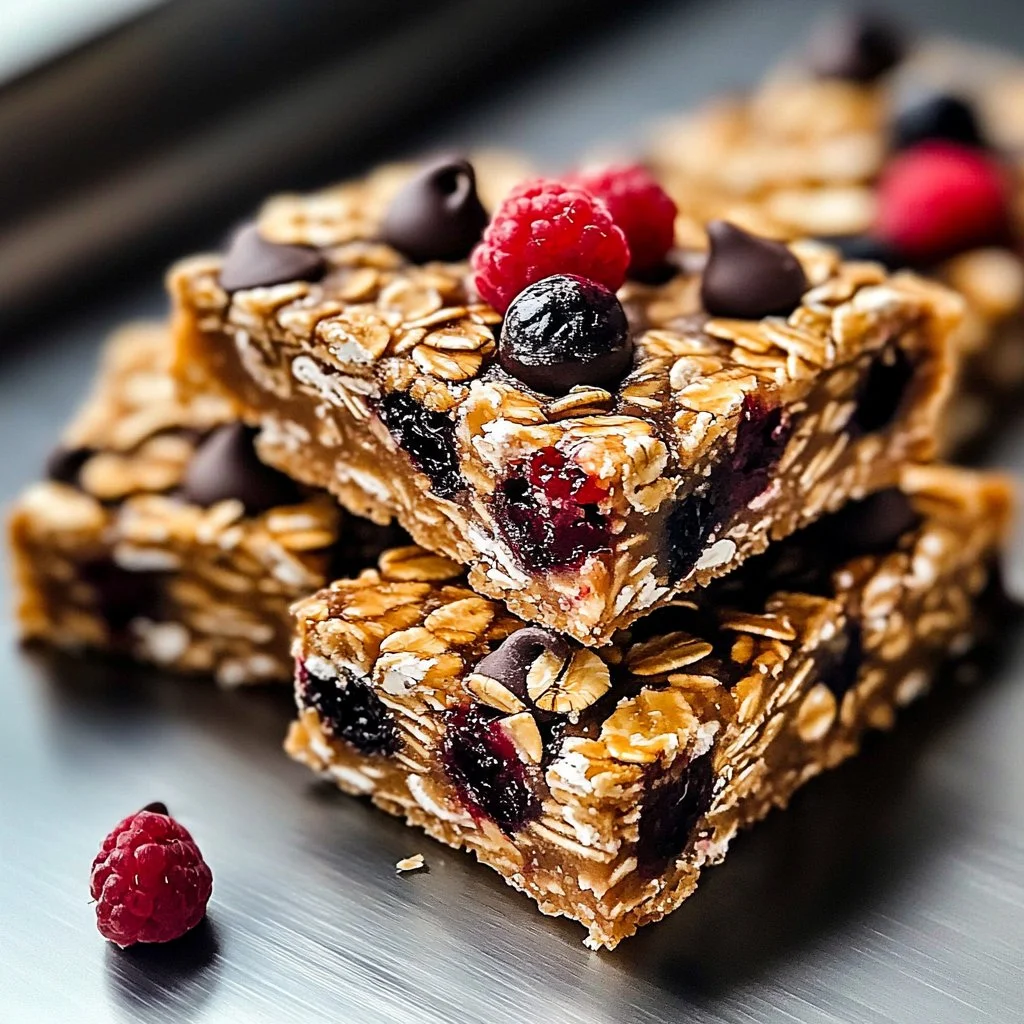
The No Bake Granola Bars recipe brings a delightful combination of textures and flavors, ensuring each bite feels like a wholesome hug. Picture the crunch of old-fashioned oats mingling with the creamy smoothness of nut butter, complemented by the sweet hint of honey or maple syrup.
These bars promise a satisfying chew, offering a delightful experience that perfectly balances your craving for both nutrition and indulgence.
This step-by-step guide will help you craft these delicious snack bars, perfect for busy mornings or a midday pick-me-up.
History / Fun Fact
Granola bars have a fascinating history that dates back to the late 19th century. Their roots can be traced back to the health movement inspired by Sylvester Graham, who advocated a holistic approach to eating. Over time, granola bars evolved into the convenient snack we love today, especially in the health-conscious era of the 1970s. Interestingly, the original granola was a dry breakfast cereal that inspired many variations, leading to the creation of healthful snacks like our beloved no-bake granola bars. This recipe embraces simplicity while allowing for endless customization, honoring the classic roots of granola while inviting creativity.
Ingredients
- 2 cups old-fashioned oats: These hearty oats form the backbone of your bars, providing a nutty aroma and a satisfying chew, perfect for that wholesome crunch.
- 1 cup chopped almonds or walnuts: Crunchy and rich, these nuts add a robust flavor and a satisfying texture, enhancing the overall experience with each bite.
- 1/2 cup honey or maple syrup: Sweet and sticky, this natural sweetener binds the ingredients while lending a warm, inviting sweetness that enhances every flavor.
- 1/2 cup peanut butter or almond butter: Creamy and indulgent, nut butter brings a luscious richness to the bars, delivering a source of healthy fats that satisfies your cravings.
- 1/2 cup dried cranberries or raisins: These chewy morsels add a pop of color and hints of tartness or sweetness, creating a delightful contrast against the nutty base.
Cooking Time & Tips For No Bake Granola Bars
Creating your own No Bake Granola Bars can be a quick endeavor, typically requiring about 15 minutes of prep time followed by a couple of hours in the refrigerator. The beauty of this recipe lies in its versatility: you can whip up a batch in no time for a busy week ahead or savor each step leisurely on a relaxing day.
To ensure success, remember to pack the mixture firmly into your baking dish; this will help the bars hold together beautifully once chilled. Additionally, using parchment paper makes it a breeze to lift the bars out of the pan, ensuring neat and tidy squares.
Step-by-Step Directions
- Line Your Dish: To begin, find an 8×8 inch baking dish and line it with parchment paper, allowing some overhang for easy removal later. Picture the smoothness of the parchment contrasting with the sturdy baking dish, ready to cradle your creation.
- Mix the Dry Ingredients: In a large mixing bowl, combine the old-fashioned oats, chopped almonds or walnuts, and dried cranberries or raisins. Imagine the gentle rustle of the oats and the satisfying crunch of nuts as they intermingle harmoniously.
- Combine the Wet Ingredients: In a separate bowl, mix together the honey or maple syrup with your chosen nut butter. Stir until the mixture is smooth and creamy, envisioning how these rich components will unite to create a delicious binder.
- Combine Dry and Wet Mixtures: Pour the smooth mixture over the dry ingredients, watching as everything comes together. With a spatula, mix until all the dry ingredients are well coated; feel the stickiness, noting how it binds the oats and nuts into a cohesive blend.
- Press into the Dish: Transfer the mixture into your prepared baking dish, spreading it evenly. Use your hands or a spatula to press it down firmly. Imagine the satisfying density forming as you create a solid base.
- Refrigerate to Set: Place your filled dish in the refrigerator and let it chill for about 2 hours. As the mixture firms up, you can savor the anticipation of enjoying your homemade granola bars.
- Cut into Bars: Once chilled, gently lift the parchment paper from the pan. Cut the chilled mixture into squares or rectangles. Feel the firm texture under your knife as you slice through, ready to share these homemade delights.
Serving Suggestions & Occasions
These No Bake Granola Bars are incredibly versatile and can be enjoyed on numerous occasions. Pack them in lunchboxes for a nourishing result during school or workdays, or have them on hand for post-workout energy. Their delightful texture makes them an excellent companion for your afternoon tea or coffee, providing a wholesome snack that pairs perfectly with a refreshing beverage. They can also serve as a quick breakfast alternative, ensuring you kick-start your day with healthy energy.
Common Mistakes For No Bake Granola Bars
- Not Packing the Mixture Firmly: Ensure you press down the mixture well into the baking dish; otherwise, the bars may crumble and fall apart.
- Using Too Much Liquid: Stick to the recommended measurements for honey and nut butter to maintain a proper balance of moisture for the bars to hold together.
- Forgetting to Chill: Skipping the refrigeration step leads to mushy results; patience is key!
- Improper Ingredient Substitution: Certain substitutions, like using liquid sweeteners when the recipe calls for something sticky, can affect texture.
- Overbaking: This is a no-bake recipe, so avoid the temptation to put them in the oven; they need to chill and firm up instead.
Healthier Alternatives & Variations
Healthy eating doesn’t mean you have to sacrifice flavor! Consider these alternatives and variations:
- Nut-Free Options: Use sunflower seed butter and sunflower seeds to make nut-free bars, ideal for school snacks.
- Sugar Alternatives: Swap honey or maple syrup for agave nectar or date syrup to adjust sweetness based on your preference.
- Fruit Additions: Include other dried fruits like apricots, figs, or dates to enhance the flavor profile.
- Flavor Enhancements: Add dark chocolate chips, shredded coconut, or spices like cinnamon or vanilla for enticing flavor bursts.
- Protein Boost: Mix in protein powder if you’d like an added nutritional boost, perfect for post-workout recovery.
FAQs
- Can I use quick oats instead of old-fashioned oats?
While quick oats can be used in a pinch, old-fashioned oats provide a better texture and chewiness. - How long do these granola bars last?
Properly stored in an airtight container in the refrigerator, these bars can last for about a week. - Can I freeze these granola bars?
Absolutely! Wrap them individually in plastic wrap or foil and store in an airtight container in the freezer for up to three months. - What can I substitute for honey?
Maple syrup, agave nectar, or brown rice syrup work well as substitutes for honey. - Are these bars gluten-free?
Yes, as long as you opt for certified gluten-free oats, these granola bars can be enjoyed by those with gluten sensitivity. - Can I reduce the sweetness?
Certainly! Adjust the amount of honey or maple syrup according to your taste, or incorporate unsweetened nut butter for a less sweet option.
Conclusion
You won’t want to miss out on creating your very own No Bake Granola Bars. With their delightful crunchy texture, rich flavors, and customizable nature, they make satisfying snacks for any occasion. So why wait? Grab your ingredients, gather your family, and start crafting these delicious bars today—your taste buds will thank you!

No Bake Granola Bars
Ingredients
Base Ingredients
- 2 cups old-fashioned oats Provides a nutty aroma and chew.
- 1 cup chopped almonds or walnuts Adds crunch and flavor.
- 1/2 cup honey or maple syrup Natural sweetener to bind ingredients.
- 1/2 cup peanut butter or almond butter Adds richness and healthy fats.
- 1/2 cup dried cranberries or raisins Adds sweetness and color.
Instructions
Preparation
- Line an 8x8 inch baking dish with parchment paper, allowing some overhang.
- In a large mixing bowl, combine old-fashioned oats, chopped almonds or walnuts, and dried cranberries or raisins.
- In a separate bowl, mix together honey or maple syrup with nut butter until smooth.
- Pour the wet mixture over the dry ingredients and mix until coated.
- Transfer the mixture to the prepared dish, spreading it evenly and pressing down firmly.
- Refrigerate for about 2 hours until set.
- Lift the bars out using the parchment paper and cut into squares or rectangles.