The Ultimate Red Velvet Cheesecake Balls Recipe
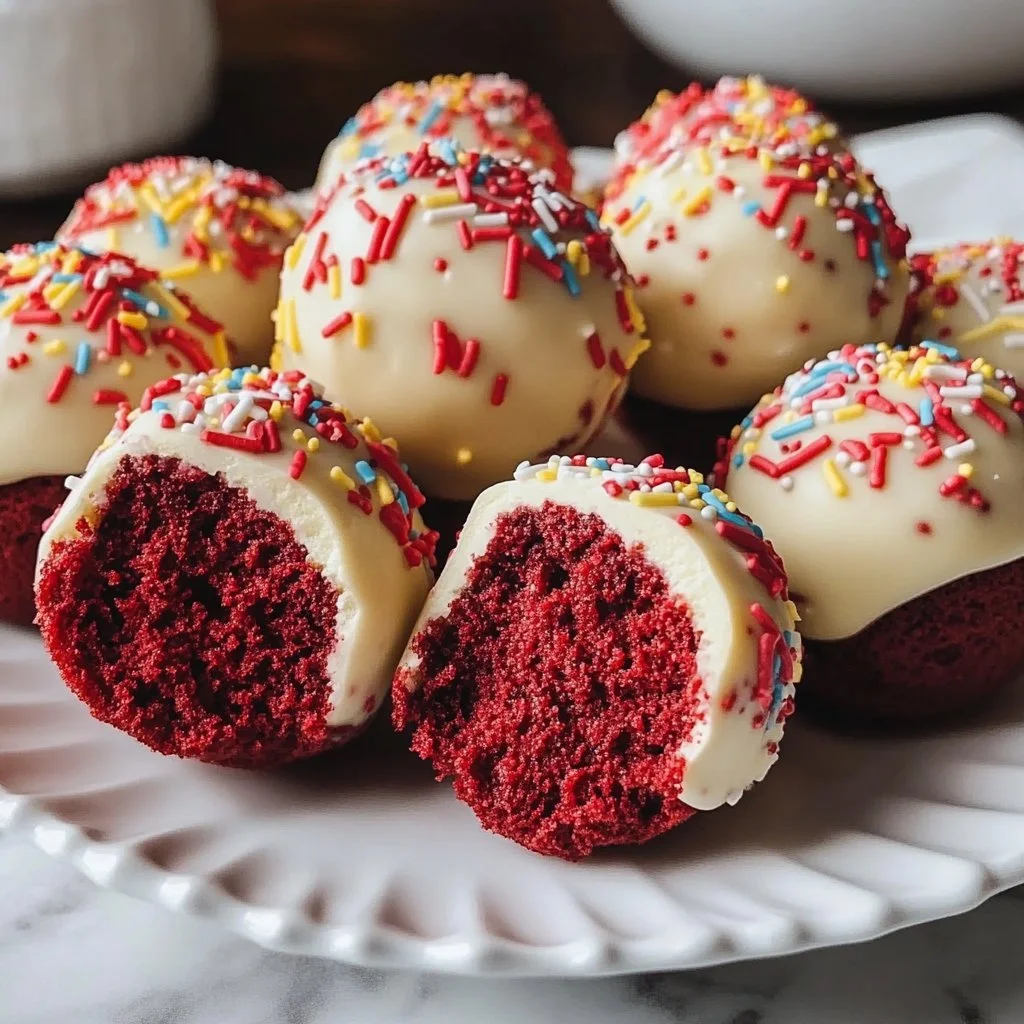
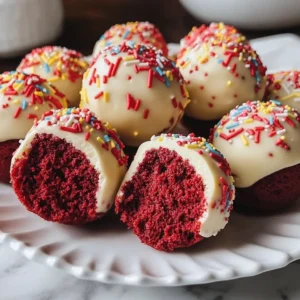
Get ready to indulge in the delightful world of The Ultimate Red Velvet Cheesecake Balls! These little bites of heaven are not only visually stunning with their vibrant color, but they also deliver a surge of sweet, creamy, and decadent flavors with every bite. The luscious red velvet cake combined with the rich cream cheese filling creates the perfect balance of textures—soft, smooth, and colorful. Ideal for any occasion, these cheesecake balls transform a classic cake recipe into an easy, no-bake treat that will leave both kids and adults begging for more.
Imagine taking a morsel of these irresistible red velvet cheesecake balls, the decadent coating cracking slightly to reveal the soft, creamy center that melts away as you savor it. These truffles evoke fond memories of family gatherings and celebrations, making them a nostalgic treat that warms the heart and delights the senses. Whether you’re preparing for a party, a holiday gathering, or simply to satisfy your sweet tooth, The Ultimate Red Velvet Cheesecake Balls are definitely worth making!
Are You Ready to Dive into Dessert Heaven?
Have you ever experienced that moment when you bite into a dessert so delectable that it transports you back to your cherished childhood memories? The kind of treat that brings a smile to your face, igniting your most delightful cravings? Picture this: you’ve just taken a relaxing evening at home, and you’re looking for something sweet to enjoy with your loved ones. What could be more satisfying than these luscious red velvet cheesecake balls, their melt-in-your-mouth texture and deep, rich flavors wrapping you in a comforting embrace?
Why You’ll Love This Recipe
This delightful red velvet cheesecake balls recipe offers several benefits that will make your taste buds and your wallet cheer in unison:
Easy Prep: With only a few simple steps, you can whip up these delicious bites quickly.
Nostalgic Appeal: The classic red velvet flavor evokes memories of celebration and indulgence.
Crowd-Pleaser: These cheesecake balls are perfect for parties, family gatherings, and holidays—everyone loves them!
Minimal Ingredients: You only need a handful of ingredients to create this indulgent treat.
Customizable: With various flavor and decorating options, you can personalize these bites to suit any occasion.
Ingredients
For the Red Velvet Cheesecake Balls
- 1 box red velvet cake mix (or homemade red velvet cake)
- 8 oz cream cheese, softened
- 1/2 cup powdered sugar
- 1 tsp vanilla extract
- 1/4 cup cocoa powder
- 1/4 cup milk (or a dairy-free alternative)
For Coating
- 1 cup white chocolate chips (or dark chocolate for a richer flavor)
- Sprinkles or crushed nuts (optional, for decoration)
Suggestions for Substitutions
- Gluten-Free Option: Use a gluten-free red velvet cake mix.
- Dairy-Free Option: Substitute cream cheese with vegan cream cheese and use dairy-free chocolate chips.
- Sweetness Adjustment: Adjust powdered sugar according to your taste preference.
Indulge your senses by combining the richness of cream cheese with the unique notes of red velvet cake, resulting in a delightfully gooey texture. The contrast of sweet, velvety cake and the creaminess of your cheesecake filling will have your mouth watering just thinking about it!
Timing
Now, let’s talk about timing. This red velvet indulgence can be both a fast and indulgent treat or a luxurious weekend project. With a quick prep time of approximately 30 minutes, you can have these cheesecake balls ready for a party or a late-night snack. However, if you’re in the mood for a luxurious experience, take your time and enjoy the process of crafting these exquisite bites, allowing the flavors to meld beautifully while chilling in the refrigerator.
Step-by-Step
1. Bake the Cake
Follow the instructions on the red velvet cake mix box, or unleash your inner baker with your favorite homemade red velvet recipe. Allow it to cool completely for the best results.
2. Crumble the Cake
Once cooled, crumble the cake into a large mixing bowl, ensuring there are no large chunks. The finer the crumbs, the smoother your cheesecake balls will be!
3. Combine Ingredients
In a separate bowl, mix the softened cream cheese, powdered sugar, vanilla extract, cocoa powder, and milk until you achieve a smooth and creamy consistency. This heavenly mixture will be the heart of your cheesecake balls, filling them with rich flavor.
4. Mix with Cake Crumbs
Gradually add the cheesecake mixture to the crumbled cake, combining them thoroughly until a dough-like consistency forms. Don’t be shy—getting your hands messy is part of the fun!
5. Shape the Mixture
Using your hands, scoop out about 1 tablespoon of the mixture and roll it into a ball. Repeat until all the mixture is used up. Your hands will be covered in crimson joy!
6. Chill the Balls
Place the formed balls on a baking sheet lined with parchment paper and refrigerate for about 30 minutes. This step will help firm them up, making the coating process easier.
7. Melt the Chocolate
In a microwave-safe bowl, melt the white chocolate chips in 30-second intervals, stirring until smooth. The velvety chocolate will provide a luxurious coating for your sweet treats.
8. Dip the Balls
Remove the chilled cheesecake balls from the fridge. Dip each ball into the melted chocolate, ensuring it’s fully coated. Use a fork to lift it out and let the excess chocolate drip off, leaving a beautiful, glossy finish.
9. Decorate
If desired, sprinkle with crushed nuts or colorful sprinkles before the chocolate sets. This playful touch adds an element of joy to your cheesecake balls!
10. Set the Coating
Place the coated cheesecake balls back on the parchment-lined baking sheet and refrigerate for at least 1 hour to set.
11. Serve
Once set, serve your Ultimate Red Velvet Cheesecake Balls on a platter. They can be enjoyed immediately or stored for later!
Every step taken to create this decadent treat is worth it when you see the delight on your family and friends’ faces. The rich red color, combined with the soft creamy interior and the satisfying crunch of the outer chocolate coating, ensures that each bite is a memorable experience!
Nutritional Information
Indulging in the fluffy goodness of red velvet cheesecake balls offers a delightful experience, but it’s essential to keep in mind that each ball is a sweet treat. Each ball contains approximately 120 calories. While it’s always a joy to dive into these delights, moderation is key to enjoying these indulgent treats without compromising your healthy habits.
Healthier Alternatives
If you’re looking to lighten the overall sweetness or accommodate specific dietary needs, consider these healthier alternatives:
Low-Sugar: Opt for a sugar-free red velvet cake mix and reduce or substitute the powdered sugar for a sweetener of choice.
Dairy-Free Swaps: Replace cream cheese with vegan cream cheese and use dairy-free chocolate chips to accommodate those with lactose intolerance.
Serving Suggestions
These delectable red velvet cheesecake balls are perfect for various occasions! Serve them at holiday gatherings, birthdays, or as bite-sized sweet treats at casual get-togethers. Pair them with a scoop of vanilla ice cream for an ultra-indulgent dessert experience!
Common Mistakes
As you craft these delightful bites, keep these common mistakes in mind to ensure perfect results:
Overbaking: When preparing the red velvet cake, be careful not to overbake, as this can lead to a dry texture.
Texture Issues: For optimal texture, make sure to combine the cake and cheesecake mixture thoroughly, avoiding large lumps.
Messy Coating: To avoid a chocolatey mess, make sure to let the excess chocolate drip off before placing them back on the parchment paper.
Storing Tips
Proper storage ensures you can enjoy these treats later on! Here are some tips:
Freezing Portions: Freeze any leftovers in an airtight container for up to two months. Perfect for unexpected guests!
Reheating Instructions: For best results, it’s recommended to enjoy them chilled straight from the fridge or at room temperature rather than reheating.
Tempt Readers to Bake it ASAP
Are your taste buds tingling yet? The time has come to treat yourself and those you love to The Ultimate Red Velvet Cheesecake Balls! These indulgent, creamy bites are calling your name, promising to bring joy and decadence to every occasion. Don’t wait—gather your ingredients, roll up your sleeves, and dive into this heavenly dessert adventure. You won’t regret it!
FAQs
1. Can I use homemade red velvet cake for this recipe?
Yes! You can definitely use a homemade red velvet cake instead of a boxed mix for a more personal touch.
2. How long do the cheesecake balls last in the fridge?
When stored in an airtight container, they can last up to one week in the refrigerator.
3. Can I prepare these cheesecake balls ahead of time?
Absolutely! You can prepare and coat them a day in advance, letting them chill overnight for a hassle-free dessert.
4. What’s the best way to decorate the cheesecake balls?
Sprinkles, crushed nuts, or even a drizzle of chocolate on top work beautifully for decoration!
5. Can I substitute the cream cheese in the filling?
Yes! You can use a dairy-free cream cheese alternative to make these cheesecake balls suitable for a vegan diet.
Embrace the nostalgic joy of The Ultimate Red Velvet Cheesecake Balls and make them the centerpiece of your next gathering or a special treat just for you!
Red Velvet Cheesecake Balls
Ingredients
For the Cheesecake Balls
- 1 box red velvet cake mix (or homemade red velvet cake)
- 8 oz cream cheese, softened Can substitute with vegan cream cheese for dairy-free option.
- 1/2 cup powdered sugar Adjust according to sweetness preference.
- 1 tsp vanilla extract
- 1/4 cup cocoa powder
- 1/4 cup milk (or a dairy-free alternative)
For Coating
- 1 cup white chocolate chips (or dark chocolate for a richer flavor)
- Sprinkles or crushed nuts (optional, for decoration)
Instructions
Preparation
- Bake the Cake: Follow the instructions on the red velvet cake mix box, or use your favorite homemade recipe. Allow it to cool completely.
- Crumble the Cake: Once cooled, crumble the cake into a large mixing bowl, ensuring there are no large chunks.
- Combine Ingredients: In a separate bowl, mix the softened cream cheese, powdered sugar, vanilla extract, cocoa powder, and milk until smooth and creamy.
- Mix with Cake Crumbs: Gradually add the cheesecake mixture to the crumbled cake and mix until a dough-like consistency forms.
- Shape the Mixture: Scoop out about 1 tablespoon of the mixture and roll into a ball. Repeat until all mixture is used.
- Chill the Balls: Place the formed balls on a baking sheet lined with parchment paper and refrigerate for about 30 minutes.
- Melt the Chocolate: In a microwave-safe bowl, melt the white chocolate chips in 30-second intervals, stirring until smooth.
- Dip the Balls: Dip each chilled cheesecake ball into the melted chocolate and let the excess chocolate drip off.
- Decorate: Sprinkle with crushed nuts or colorful sprinkles before the chocolate sets.
- Set the Coating: Place the coated cheesecake balls back on the baking sheet and refrigerate for at least 1 hour to set.
- Serve: Once set, serve on a platter. Enjoy immediately or store for later!